Oracle11gR2 Database 導入手順 (ver 11.2.0.3.0)

Oracle11gR2 RAC 環境におけるOracleDatabase導入手順について記載します。 前提としてOracle Grid Infrastructureを導入しておく必要があります。手順は過去の投稿を参考にしてください。
Oracle Grid Infrastructure 11gR2 導入手順
1.X環境準備
事前にXwindowが起動できる環境を準備しておく必要があります。 環境によっては、正常に表示されない場合や画面が次に進まない場合がありますで、 VNCを利用すると確実だと思われます。
2.インストーラ起動
oracleユーザにスイッチし、インストーラーを起動します。 パッチセット(11.2.0.3.0)を使用します。 以下のスクリプトを実行してください。
/<zipファイル展開場所>/database/runInstaller
$ ./runInstaller
********************************************************************************

Your platform requires the root user to perform certain pre-installation
OS preparation.  The root user should run the shell script 'rootpre.sh' before
you proceed with Oracle installation.  rootpre.sh can be found at the top level
of the CD or the stage area.

Answer 'y' if root has run 'rootpre.sh' so you can proceed with Oracle
installation.
Answer 'n' to abort installation and then ask root to run 'rootpre.sh'.

********************************************************************************

Has 'rootpre.sh' been run by root on all nodes? [y/n] (n)
y

Starting Oracle Universal Installer...

Checking Temp space: must be greater than 190 MB.   Actual 1528 MB    Passed
Checking swap space: must be greater than 150 MB.   Actual 5120 MB    Passed
Checking monitor: must be configured to display at least 256 colors.    Actual 16777216    Passed
Preparing to launch Oracle Universal Installer from /tmp/OraInstall2013-09-10_01-16-47PM. Please wait ...$
3.インストール作業
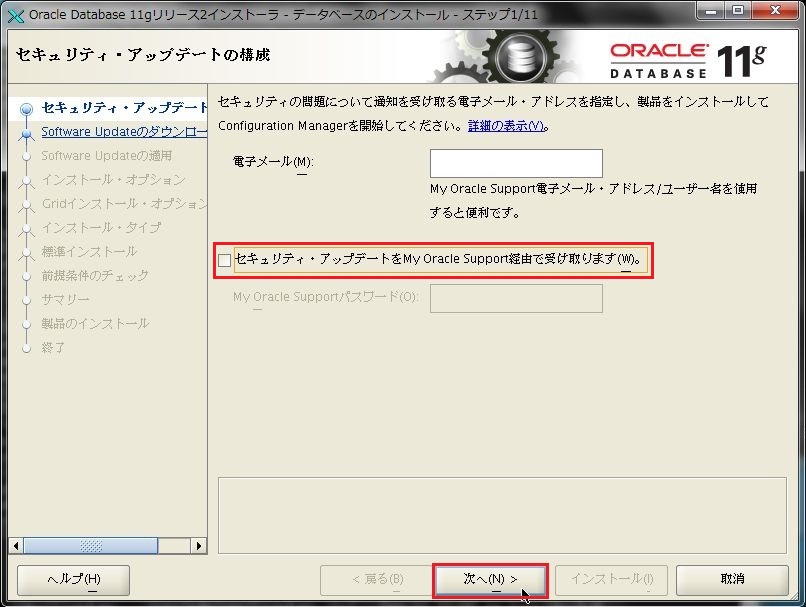
「セキュリティ・アップデートをMy Oracle Support経由で受け取りますか」のチェックを外し、「次へ」をクリックします。

警告が出るので、「はい」をクリックし次へ進みます。
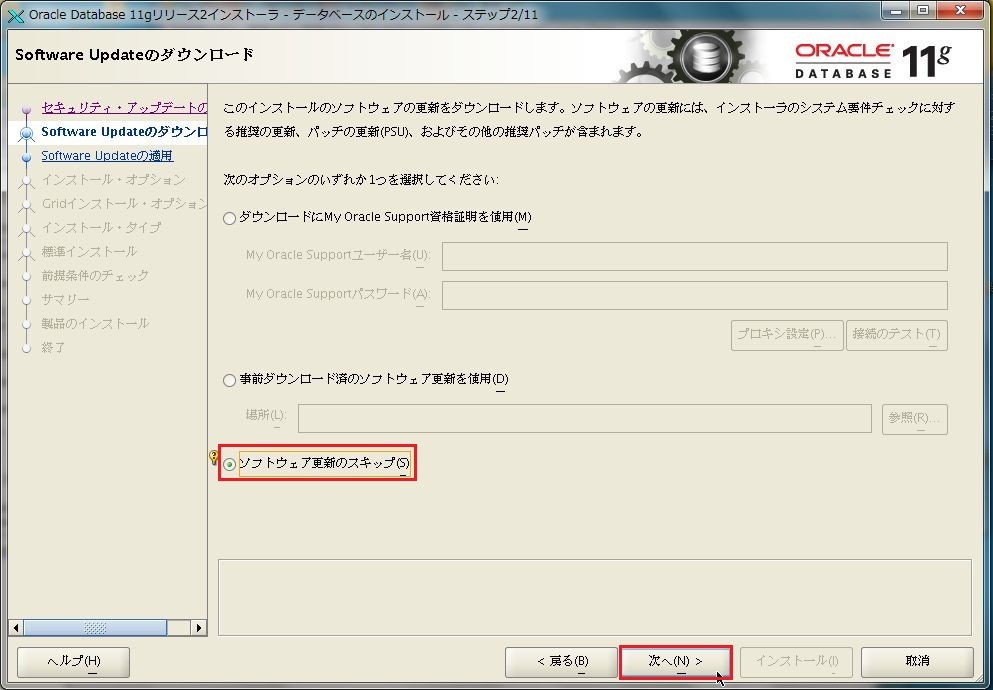
「ソフトウェア更新のスキップ」を選択し「次へ」をクリックします。
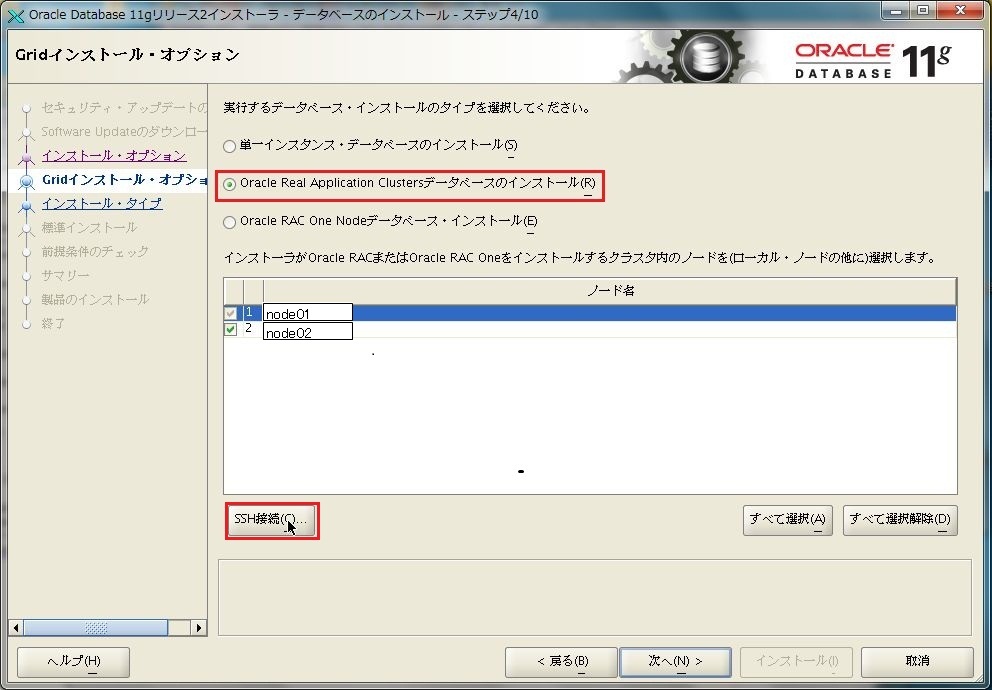
「Oracle Real Application Clasterデータベースのインストール」を選択し、「SSH構成」をクリックします。
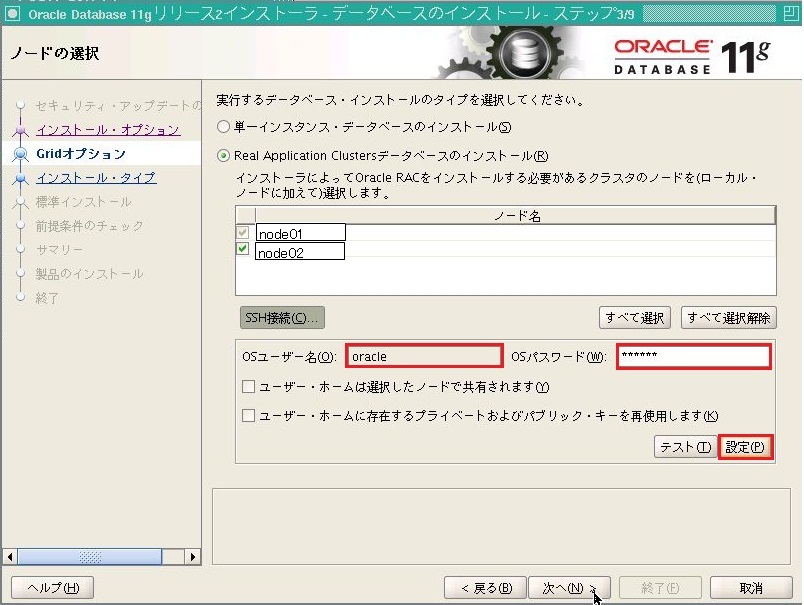
「Oracleユーザ名」にoracleユーザ名を入力し、「OSパスワード」にoracleユーザのパスワードを入力し、設定をクリックします。
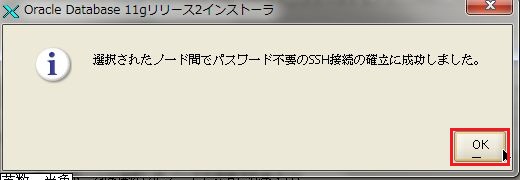
パスワード不要のSSH接続確立に成功したというポップアップが表示されるので、「OK」をクリックします。 前の画面に戻り、「次へ」をクリックします。
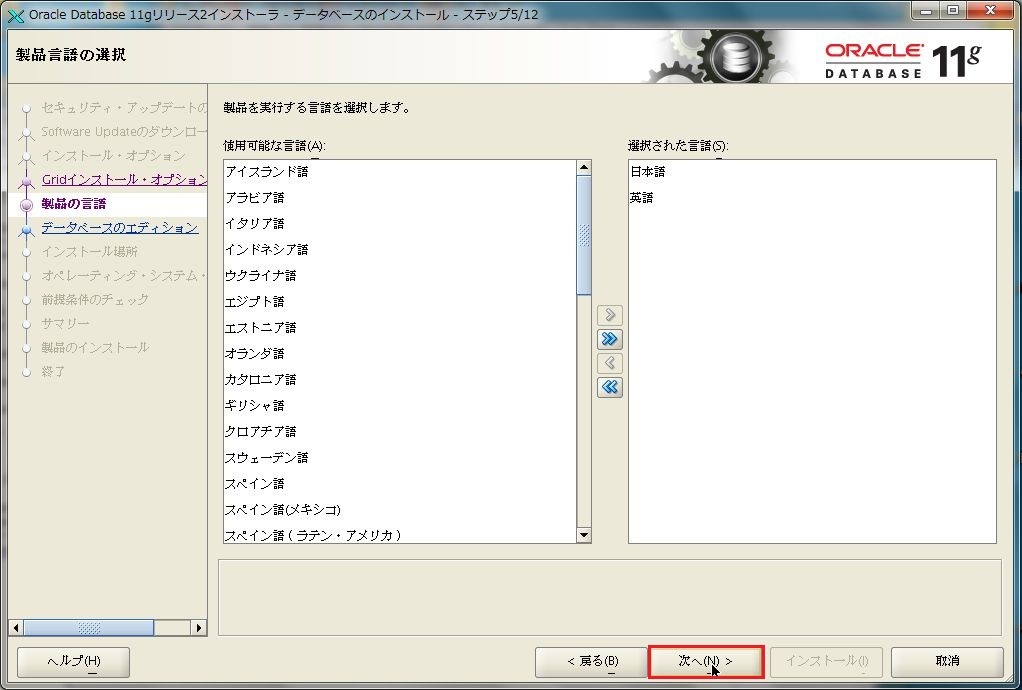
日本語と英語が選択されていることを確認し、「次へ」をクリックします。
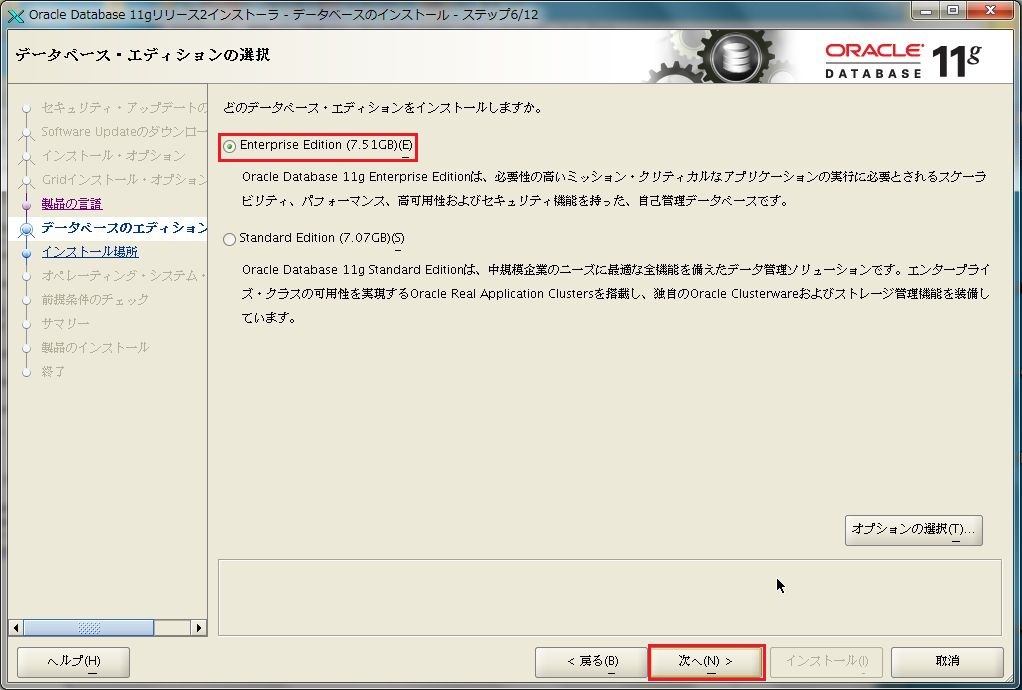
「Enterprise Edition」を選択し、「次へ」をクリックします。
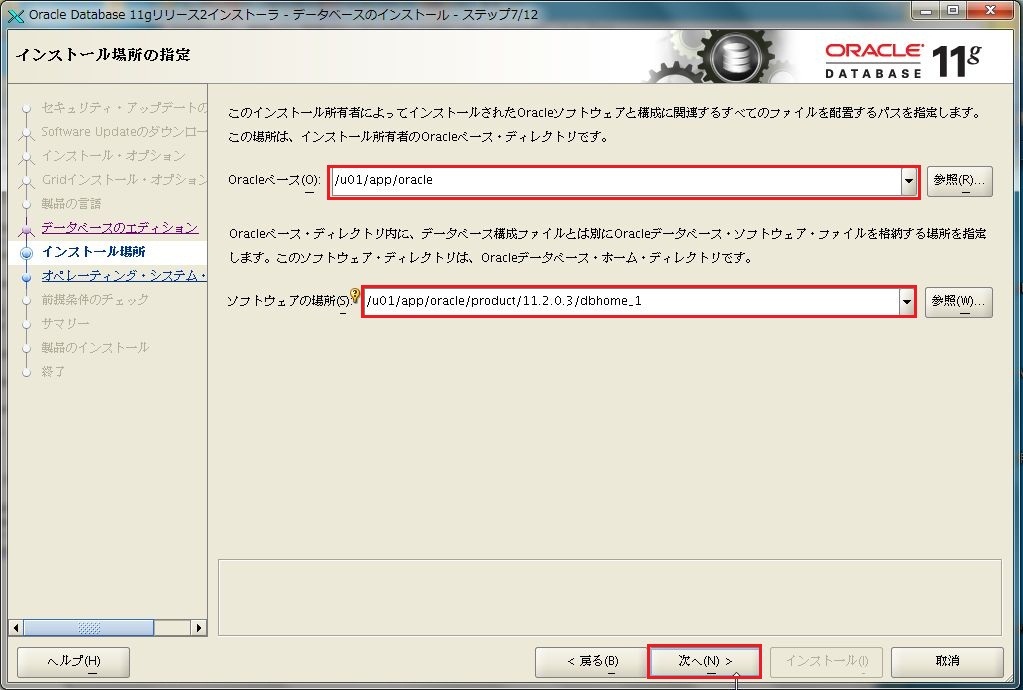
「Oracleベース」と「ソフトウエアの場所」入力します。ソフトウェアの場所にはOracleホームを入力します。次へをクリックします。
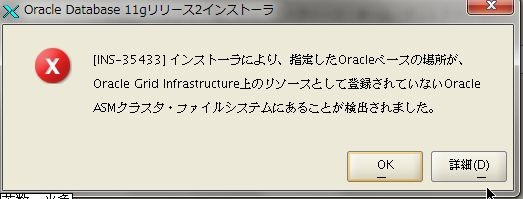
※注意:OracleベースをACFSに構成した場合このような警告がでることがあります。サポートからはPSUを適用することで回避できるとの回答がありました。なお、oracleユーザをasmadminグループのメンバーに追加することでも回避できることが確認できています。ただし、本来推奨される構成ではないためお勧めできません。
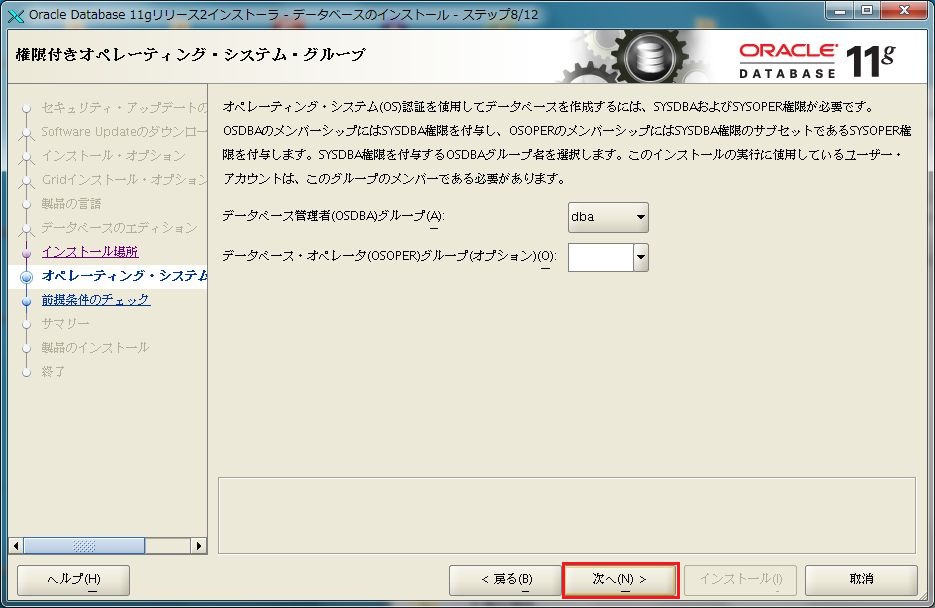
内容を確認し、「次へ」をクリックします。※OSOPERグループはオプションなので空欄でも構いません。
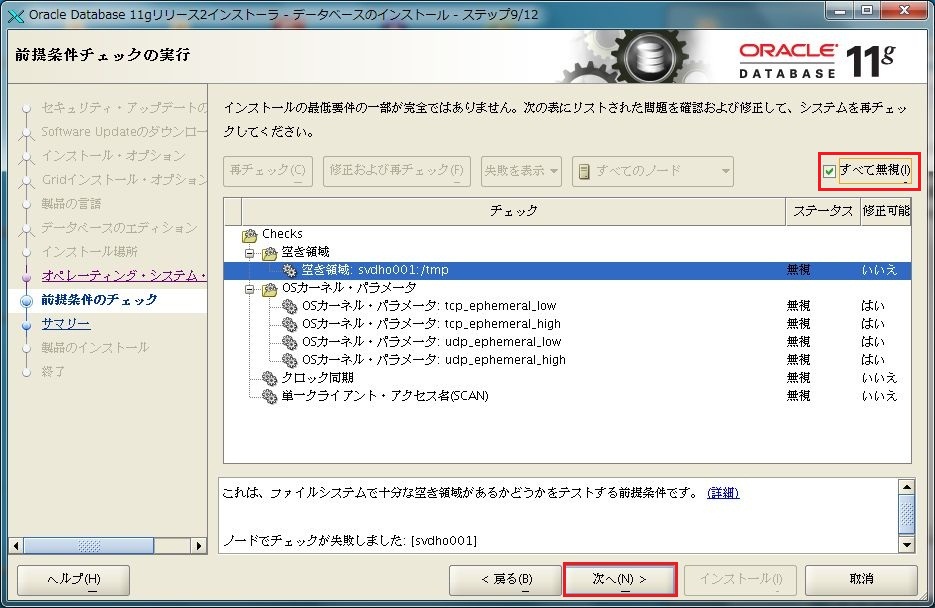
前提条件チェックが実行されます。警告および失敗が出た場合は内容を確認します。無視しても問題ない場合は「すべて無視」にチェックを入れて「次へ」をクリックします。
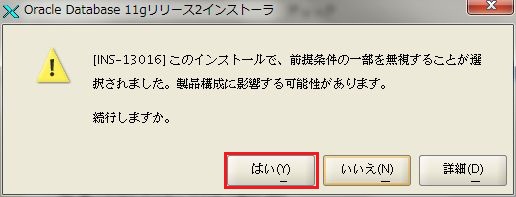
警告が出た場合は、上記のポップアップが表示されるので「はい」をクリックします。
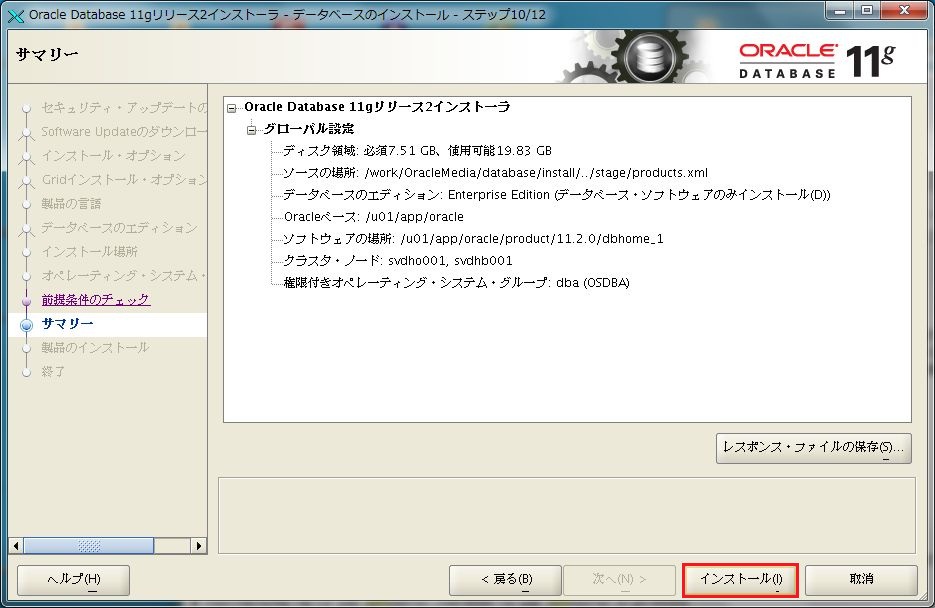
サマリーを確認し、「インストール」をクリックします。
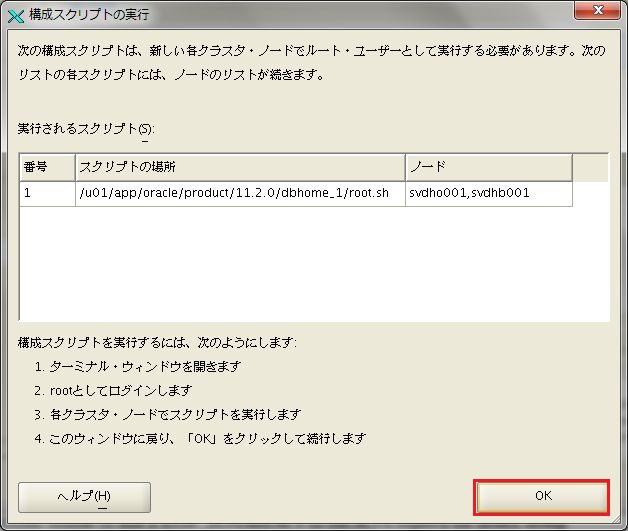
構成スクリプトの実行を求められるので、各ノードにて、rootユーザで指定されたシェルを実行します。以下に1ノード目で実行した際の出力を示します。途中、入力を求められますが全て「Enter」を押下してデフォルト値を選択しています。
# root.sh
Performing root user operation for Oracle 11g

The following environment variables are set as:
    ORACLE_OWNER= oracle
    ORACLE_HOME=  /u01/app/oracle/product/11.2.0/dbhome_1

Enter the full pathname of the local bin directory: [/usr/local/bin]:
The contents of "dbhome" have not changed. No need to overwrite.
The contents of "oraenv" have not changed. No need to overwrite.
The contents of "coraenv" have not changed. No need to overwrite.

Entries will be added to the /etc/oratab file as needed by
Database Configuration Assistant when a database is created
Finished running generic part of root script.
Now product-specific root actions will be performed.
Finished product-specific root actions.
#
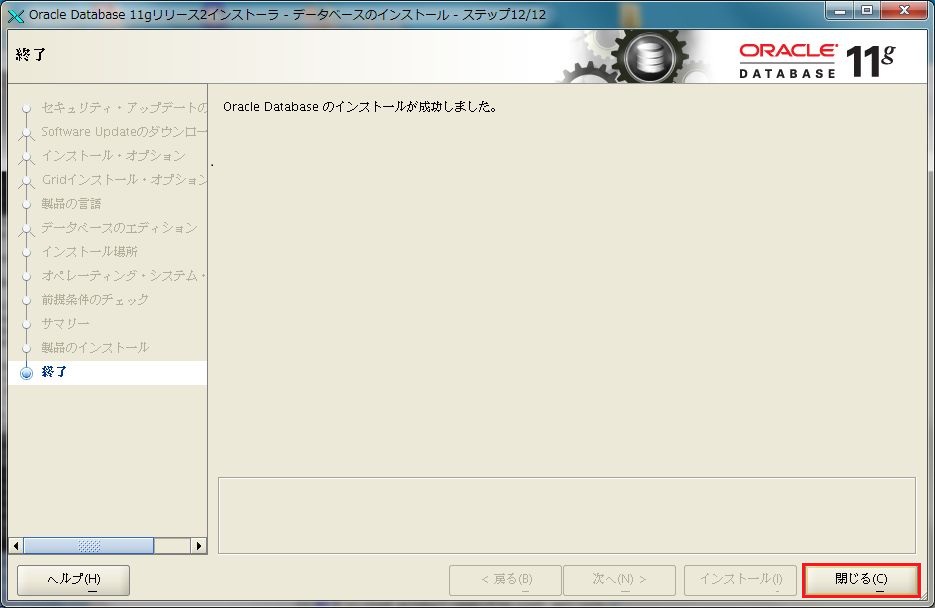
インストールが終了したら、「閉じる」クリックしインストーラを終了します。
END
タグ:11.2.0.3.0, database, install, oracle11gR2, インストール